Sunday, December 29, 2013

Growing Stack of Discloths


These are the knitted dishcloths I have completed this year (minus a few already gifted).  I enjoy having something easy to work on in the evenings when I’m watching television with my husband, but I’m kind of tired of making these. 

This is my remaining stash of cotton yarn.  The big spool was an impulse buy at the thrift store.  I don’t expect to ever finish using it up, but I’m closing in on the rest of my supply.  Once that's gone, I’m thinking of making another attempt at sock knitting.

Saturday, December 28, 2013

Time to Catch My Breath

The grocery run is done.  The roast is simmering in the slow cooker, sides are ready for warming up, and the house is as tidy as it’s going to get after two weeks of holiday traffic.  The next wave of company is not expected to walk in the front door until around 3:00.  That’s just enough time to relax a moment and work on some mindless piecing.  I've got my iPad set up on a typing stand in the hopes that I’ll be lucky enough to catch some of Bonnie Hunter’s Quilt Cam this afternoon.


I think I’ll sew some more split nine patch blocks.


Maddie is my doggie companion today.  She has been snoozing in a sunny spot under one of my sewing machine tables.

Friday, December 27, 2013


We have family visiting during the holidays so sewing has been limited to quick breaks during the activity.  Fortunately, the machine quilting project I have set up lends itself to that kind of work.  In fact, it’s best if I take frequent breaks.  Otherwise, I soon find that my shoulders feel like they are attached to my ears.  For the most part, though, I’m enjoying the process, even if it is a slow one.


One of my holiday splurges for myself was a new Christmas cactus.  I love the color and do so hope that it will thrive in our environment.

My original cactus purchased last year still has a few open blooms, making it truly a Christmas cactus.

Friday, December 20, 2013

Sewing Spaces

Today is the final linky party hosted by Vicki Welsh for The REAL Studio Tour. 

Truthfully, it could be argued that my studio location is dependent on whatever point of the quilting process I’m at, and can be characterized by being portable and stow-able.  With the exception of my mid-arm machine, everything else is done in space that has to be multi-functional.  In order to find pictures of some these spaces during the quilting process, I had to delve back into my collection of photos for several years, and a few of these may have been posted before.


 My mid-arm is permanently set up at our ranch house 25 miles from home.  It was the only place we could find that would accommodate a 10 foot table.  (And, yes, if you notice, I have an old margarine tub on top for thread clippings.)


I also have an area there for one of my vintage machines.  It sits on an old dining table that is no longer used for serving meals.  Most of my sewing time at the ranch, however, is devoted to quilting on the HQ since we don't get to spend nearly as much time there as we would like.

Sometimes, especially when working with large cuts of fabric, my cutting table is wiggled out of the laundry room and set up in the middle of the family room.  You can see that hubby has set up operations for his own volunteer work on the dining table.  


If I’m working on smaller cuts, my favorite spot is the kitchen island. The light and height are wonderful and there is absolutely no wobble to it!  (My long-suffering husband would really prefer I not use this area.)

If I’m preparing applique pieces or drafting Jane Stickle blocks, I take over the kitchen table. 

If I’m hand stitching applique or knitting dishcloths, you’ll find me snuggled into my glider in the bedroom with a girly movie in the dvd player.


The nerve center of all this activity, however, is my sewing room where my sewing machines are set up.  It truly is my happy space.  Right now it's configured for machine quilting on my Janome.  The machine I use for the majority of my piecing, is next to it at right angles. My mother would be appalled if she saw how messy I am.


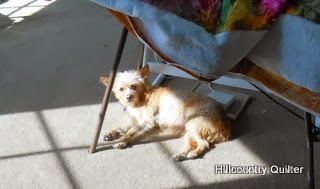
This is the same room from a different angle.  The space is shared with my elliptical and usually one of our two dogs is keeping me company.  Today it is Harley the Corgi.  The old television stand on the left holds my binders of completed Jane Stickle blocks plus sewing tools on the shelves on the sides.


My studio also serves as a second guest room and must be cleared out from time to time to make room for air mattresses.  This is a good thing because we love it when our grandsons visit and it motivates me to tidy up.

I’m linking up with Vicki’s REAL Studio Tour today.

Friday, December 13, 2013

The REAL Studio Tour -- Storage Solutions


Participants in Vicki’s REAL Studio Tour are asked to post about storage tips today. 


Here is my travelling sewing tool kit.  Virtually every Tuesday I’m sewing with friends in a space we rented when our local quilt shop closed.  We have created a very nice place to gather and sew and some weeks I spend as much time sewing there as I do at my home studio.  So, I needed to devise a way to organize my tools so that they were portable and easily accessible both at “Our Place” and at home. 

Several of us bought these tool boxes at hardware stores.  Some of our members even found feminine pink ones and one carries a red one.  


I found some small plastic boxes at an office supply store that fit it perfectly and I borrowed my husband’s label maker to help me keep their contents straight. Now, whether I'm sewing at home or with friends or at our ranch house, this little carrier is on the floor next to my chair.  It's organized to my needs and has helped me avoid buying quite so many duplicate notions.  When it's time to clear out my sewing room to make room for air mattresses, it tucks neatly away in a closet.  


I’m linking up with Vicki’s post today where others will be sharing their tips on storage.  I’m looking forward to learning from their ideas.  Storage and organization are definitely not my strength.  

Vicki is offering chances at a very nice giveaway to anyone who participates, so be sure to link up with your ideas.  We will all benefit.

Saturday, December 7, 2013

Winter Has Arrived and Some Retail Therapy

We cancelled plans and stayed at home Friday because of icy conditions.  It never warmed up enough for the ice in our rain chain to melt. 


Originally I was going to join an outing with friends to visit the grand opening of an almost local quilt store, but none of us wanted to brave the road conditions.  Fortunately, there will be other opportunities since it is relatively close.


Not all was lost, however, as I already had done some retail therapy earlier in the week.  I piggy-backed a trip to two craft stores when hubby had an appointment in the “Big City.”  I didn’t purchase any fabric, but here is the loot I came home with.  Gotta love those 40 and 50% off coupons.

Friday, December 6, 2013

The Real Studio Tour -- Non-Traditional Tools


Vicki at Field Trips in Fiber is hosting a REAL Studio Tour, versus the beautiful and uncluttered studios that both fascinate and torment me in magazines.  Does anyone manage to keep their space in such pristine condition and still quilt?  If so, they certainly have my admiration.  At any rate, Vicki's tour sounded like fun, and I decided to play.  Today we are invited to post about non-traditional tools.

When I began quilting in earnest about six years ago, I never imagined that two of my favorite go-to tools would be a ceramic floor tile and a cuticle stick.  Here they are.  I was going to recover the tile for this post so it didn't look so icky, but this series is supposed to be about keeping it real!


My preferred method for turned edge applique uses starch and melt-resistant templates.  A workshop instructor suggested that a floor tile wrapped in a couple of layers of muslin made a good ironing surface for this technique.  It is small enough to rotate as I work my way around the piece and the extra hard surface seems to aid in the process as well.  The muslin is secured on the back with flat head pins.  

As I paint the edges of the fabric with starch, they stick to the ironing surface making it difficult to roll them over the template.  The cuticle stick is the best tool I've found for lifting the edges enough to begin the ironing process. 

Be sure to visit Vicki's blog to see the non-traditional tools other quilters use. 

Sunday, December 1, 2013

Jane Stickle Block Progress for November


Here are two Jane Stickle blocks I am counting as finishes in November even though I had to complete a few applique stitches and trimming today.  This brings me to a total of 34 completed triangles.  There are 18 triangles plus 4 corner kites yet to be done.


My hubby surprised me with this plant last week…just ‘cuz.